Scientific Name: Alnus glutinosa
Family: Birch
Scientific Family: Betulaceae
How to identify Alder Download your free seed harvest handbook
Picking
The cones can be collected from the trees from about October onwards. The later you leave it, the fewer seeds will be left in the cones as they begin to disperse. They do not have to be completely brown, but they should have already started to turn brown. Collect them into cotton or hessian bags preferably. If they are left in plastic bags they may heat up causing damage – they have a high moisture content.

Extraction and storage
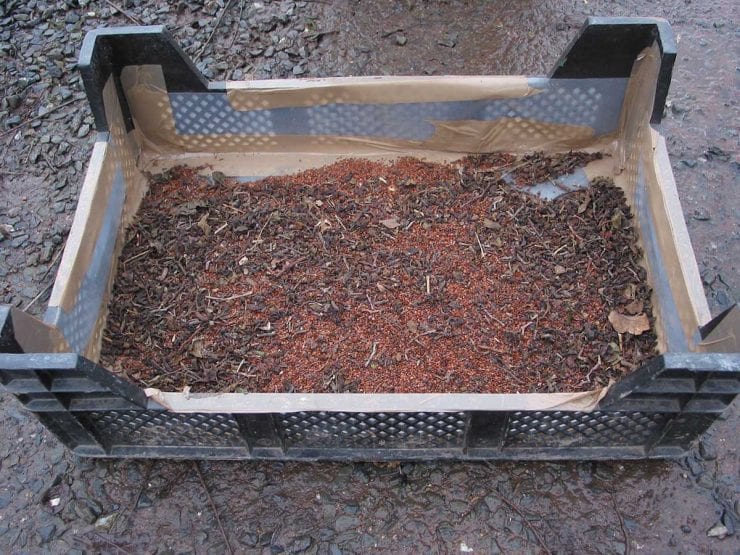
The cones should be stored in a plastic, wooden or metal container – like a biscuit tin or bread basket lined with plastic sheeting. The container is placed somewhere warm.
As they dry, the cones will open and release their tiny seeds. We stack bread baskets on top of each other and the seeds fall through each layer to the bottom, lined basket. The seeds can be left like this all winter. To loosen the last of the seeds place the cones into a sealed bag and shake. This should release the remaining seeds.
Your extracted seeds can now be stored in plastic bags, sealed and labelled in a cool, dry place (the fridge is ideal – NOT the freezer).
Pretreatment
Four weeks prior to sowing, place your extracted seeds in a cotton bag and soak them in clean, cold water for 24-48 hours. The seeds should then be surface dried. This can be achieved by placing the full bag of seeds (tied tightly) in a spin drier and running this for a minute or so. Alternatively, an old pair of tights can be used, the bag of seed placed in the ‘foot’ and spun carefully around the head.
Mix the seeds with a little moist horticultural sand and place in loosely-tied plastic bags in the bottom of a fridge (not the freezer!). Four weeks at low temperatures for moist alder seed improves the speed and evenness of germination.

Sowing
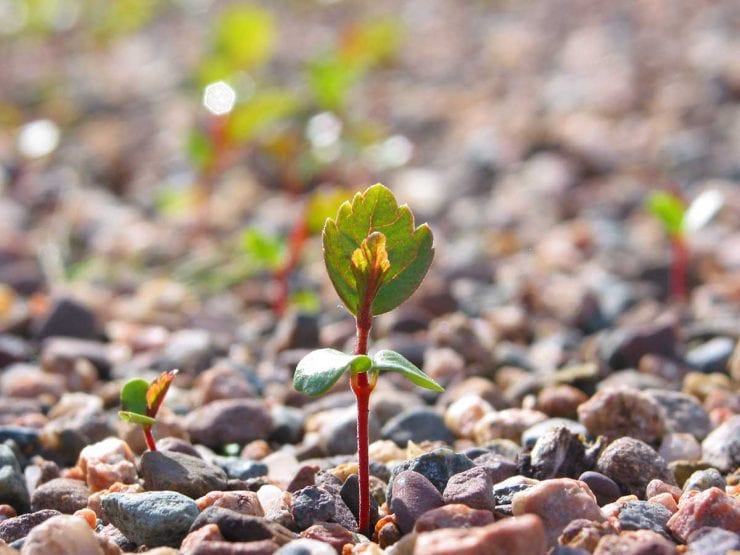
Alder grows very fast provided plenty of moisture is available to them. Aim to sow during April on seedbeds or in a pot (around 5 seeds per pot and remove all but the strongest seedling).
Cover the seed thinly (3-5mm of coarse horticultural sand or grit). It is important that the seed is not covered too thickly as this could prevent germination. Firm the seeds gently.
Watering
Never let alder seeds or young seedlings dry out! These are trees that grow on damp ground and drying out can very quickly lead to the death of many plants. Stand pots in a shady, sheltered spot outside and water, from the top, until the seedlings emerge. Keep moist at all times.
Growing
Following pretreatment in the fridge, alder should germinate rapidly. Alder can produce its own nitrogen (the element essential for strong growth). Check this out when you dig up your seedlings in the winter. Look for the root “nodules” – small, orange lumps on the roots. This is the point where certain bacteria extract nitrogen from air pockets in the soil and make it available to the trees. Because of this, feeding alder in seedbeds is not so important, but they will benefit from a small application of fertilizer when they are about six weeks old.
It would not be unreasonable to expect up to 60cm growth in the first year, but the plants can be transplanted or left in the pots (repotting if necessary) for another year. Plants in pots will need to be fed regularly whilst they are actively growing (April-September).
Planting
When your alder is tall enough, it can be planted into its new home. Prepare the site well by clearing away any weeds or grass and make a hole big enough to accommodate the root ball. Plant carefully in the hole, to the same depth as it was in the pot, and firm back the soil.
